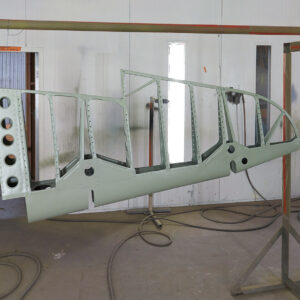
The Dauntless team is presently focusing on the control surfaces. The rudder, in particular, is receiving a lot of attention. Although comprised of mostly original components (from a parts donor airframe) the rudder had undergone disassembly and reassembly at some previous point in its life, and some of its components did not align properly. The team at Pioneer Aero has been working to resolve these issues.
Furthermore, the team discovered a cracked doubler (non-original) in the rudder, which they removed and replaced with a newly-manufactured component. They also checked the rudder hinge mounting point alignment in a purpose-built jig. Following completion of the structural work on the rudder, Pioneer Aero personnel painted and prepared it for recovering in new fabric.
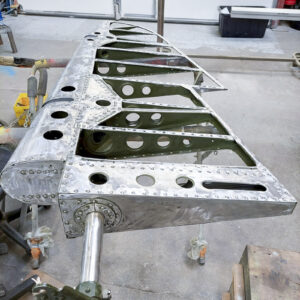
Most of the rudder structure components are original. The sheet metal doubler at the lower edge of the rudder had some issues which necessitated its replacement. (image via Pioneer Aero)
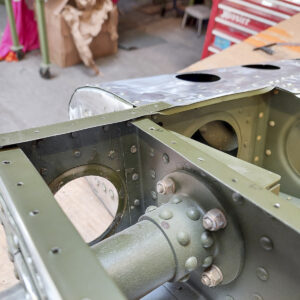
The inside of the rudder in the area where the right hand side doubler has been removed for replication. (image via Pioneer Aero)
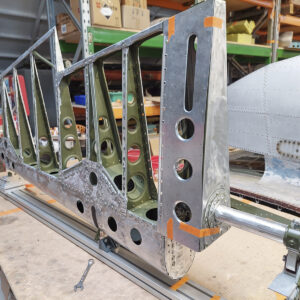
The rudder on the purpose-built holding fixture to check hinge alignment. The replacement doubler for the lower right hand side is visible, temporarily held in place by orange masking tape. (image via Pioneer Aero)
Any newly-created parts for the project are prepared in line with Douglas Aircraft Company drawings for the SBD. For instance, the rudder required the refabrication of a sheetmetal doubler near the torque tube mount at its base (see above). The piece features flanged holes, swaged edges and dimpled holes (for fabric retention) as per the original specifications.
Once the new piece was primed and installed, the whole rudder was then prepared to receive a strontium epoxy wash primer over each of the remaining bare aluminum surfaces. This was then over sprayed with primer. While these specific coatings differ from those applied during wartime manufacture, such more modern techniques will provide the airframe with significantly greater corrosion protection and help ensure its longterm preservation.
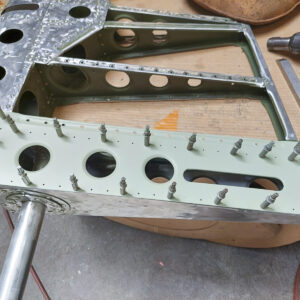
The new panel complete with flanged holes and swaged edge pinned in place ready for riveting. (image via Pioneer Aero)
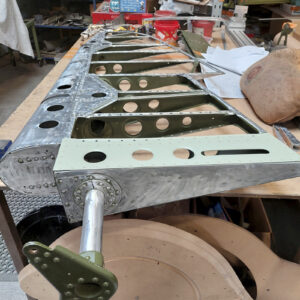
Riveting complete. Access to the tails of the rivets for setting them was a little awkward, but small hands and strong fingers can be an asset! (image via Pioneer Aero)
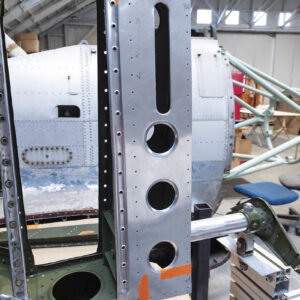
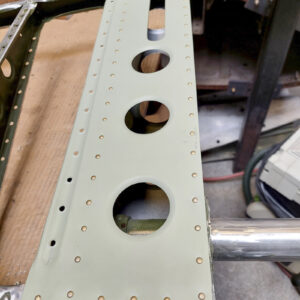
More detail showing the flanged holes, swaged edge with the dimpled holes for the fabric retaining. All done per original SBD drawings and using 2024-T3 Aluminum. (image via Pioneer Aero)
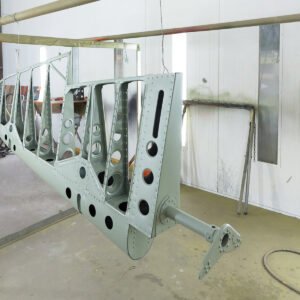
The rudder received an epoxy strontium wash primer over the bare aluminum surfaces, then an overcoating of strontium epoxy primer. (image via Pioneer Aero)

